Rich Text Laravel - Introduction
Tony Messias
Version 1.0.0 of the Rich Text Laravel package was released last week and I wanted to work on some content to showcase the package.
If you prefer video, I've recording a tutorial based on this post:
So, let's dive right in.
The Demo App
Before we start talking about Trix and how the package integrates Laravel with it, let's create a basic journaling application, where users can keep track of their thoughts (or whatever they want, really).
To create the Laravel application, let's use Laravel's installer:
laravel new larajournalI'm gonna be using Laravel Sail, so let's publish the docker-compose.yml file:
php artisan sail:install --with=mysqlYou will need Docker and Docker Compose installed, so make sure you follow their instructions. Also, feel free to use php artisan serve or Laravel Valet, if you want to. It doesn't really matter for what we're trying to do here.
Let's start the services:
sail up -dWe should have both our database and the web server running. You can verify that by visiting http://localhost on your browser, or by listing the ps command, where all statuses should be Up:
sail psLet's install the Breeze scaffolding so we can have basic authentication and a protected area scaffold for us:
composer require laravel/breeze --devphp artisan breeze:installnpm install && npm run devNow, we'll create the model with migration and factory:
php artisan make:model Post -mfLet's add a title and acontentfield to thecreate_posts_table` migration we have just created:
Schema::create('posts', function (Blueprint $table) { $table->id(); $table->foreignId('user_id')->constrained(); $table->string('title'); $table->longText('content'); $table->timestamps();});We also added the Foreign Key to the users table so we can isolate each user's posts. Let's update the User model to add the posts relationship:
class User extends Authenticatable{ use HasApiTokens, HasFactory, Notifiable; // ... public function posts() { return $this->hasMany(Post::class); }}Now, lets edit the DatabaseSeeder to create a default user and some posts as well as some random posts so we can just check that we don't see other user's posts:
User::factory()->has(Post::factory(3))->create([ 'name' => 'Test User', 'email' => 'user@example.com',]); User::factory(5)->has(Post::factory(3))->create();Now, let's edit the PostFactory so we can instruct it how to create new fake posts:
<?php namespace Database\Factories; use App\Models\Post;use Illuminate\Database\Eloquent\Factories\Factory; class PostFactory extends Factory{ protected $model = Post::class; public function definition() { return [ 'title' => $this->faker->sentence(), 'content' => $this->faker->text(), ]; }}And edit the Post model to remove the mass-assignment protection:
class Post extends Model{ use HasFactory; protected $guarded = [];}Now, we can migrate and seed our database:
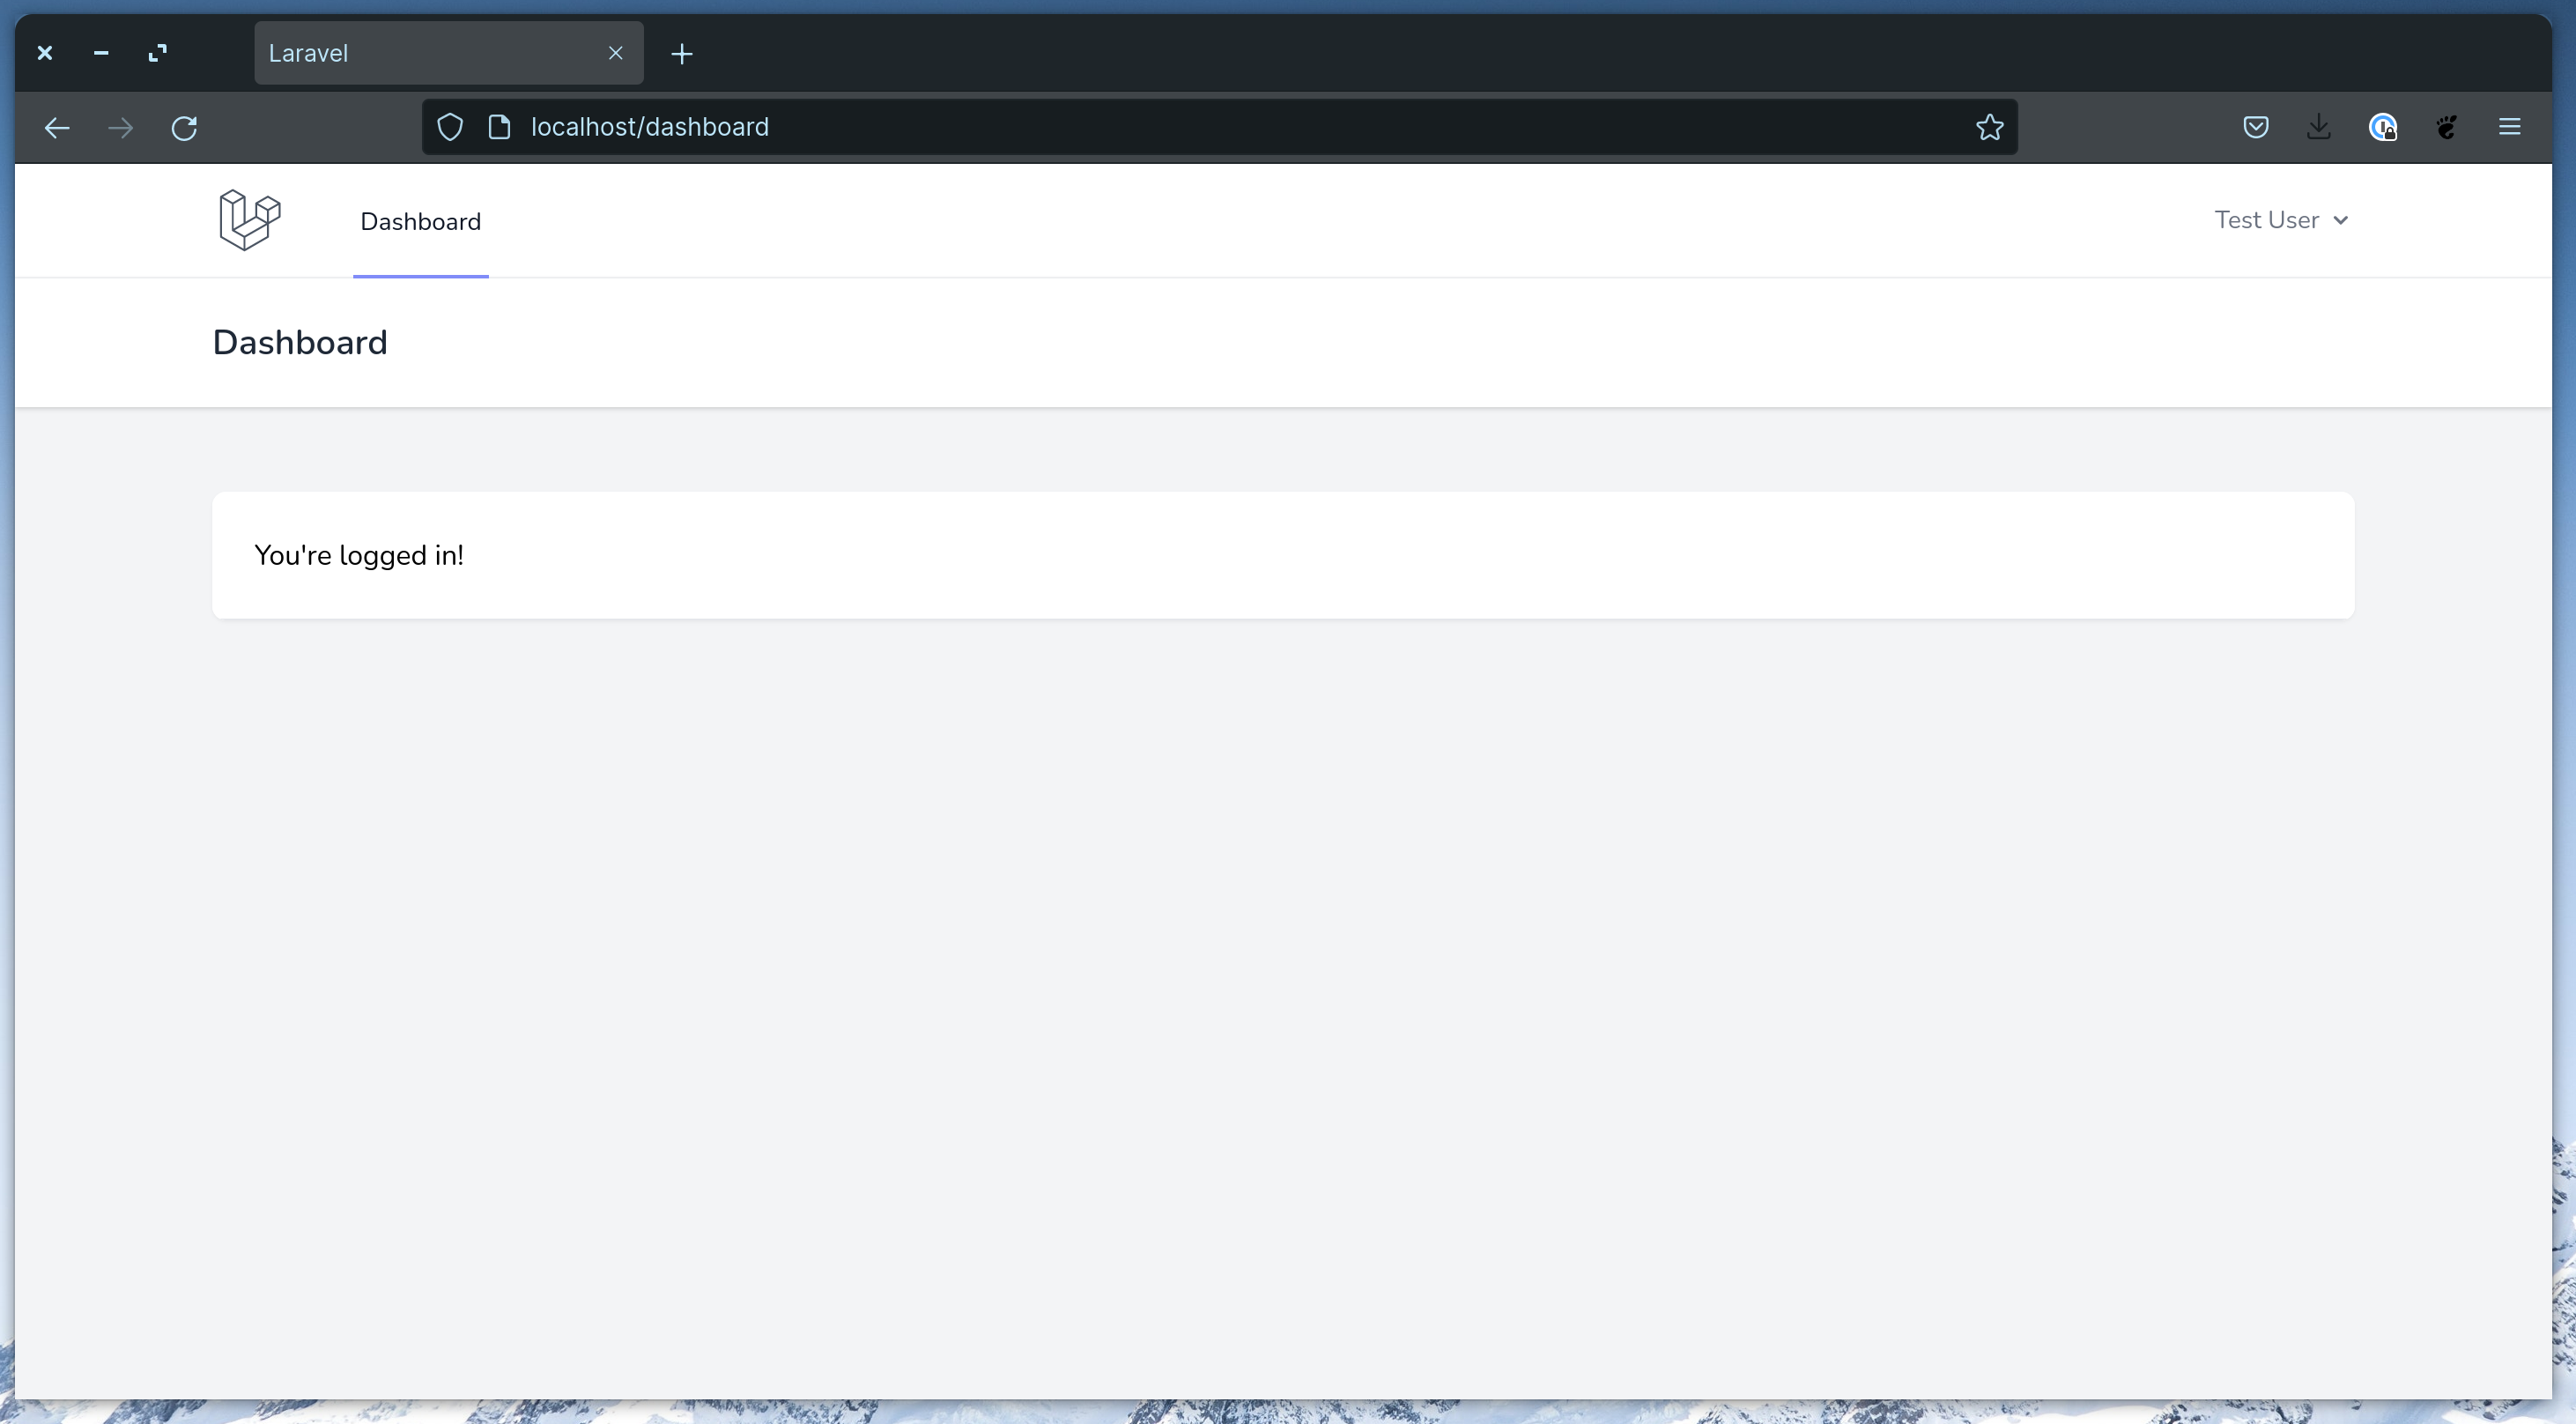
sail artisan migrate --seedNow, try to login with the user we created in our seeder. You should see the basic dashboard:
Now, let's pass down the user's post in the dashboard route at the web.php routes file:
Route::get('/dashboard', function () { return view('dashboard', [ 'posts' => auth()->user()->posts()->latest()->get(), ]);})->middleware(['auth'])->name('dashboard');Now, make use of the posts variable in the dashboard.blade.php Blade file:
<x-app-layout> <x-slot name="header"> <div class="flex items-center justify-between"> <h2 class="text-xl font-semibold leading-tight text-gray-800"> {{ __('Dashboard') }} </h2> <div> <a href="{{ route('posts.create') }}" class="px-4 py-2 font-semibold text-indigo-400 border border-indigo-300 rounded-lg shadow-sm hover:shadow">New Post</a> </div> </div> </x-slot> <div class="py-12"> <div class="mx-auto max-w-7xl sm:px-6 lg:px-8"> <div id="posts" class="space-y-5"> @forelse ($posts as $post) <x-posts.card :post="$post" /> @empty <x-posts.empty-list /> @endforelse </div> </div> </div></x-app-layout>This view makes use of two components, which we'll add now. First, add the resources/views/components/posts/card.blade.php:
<div class="bg-white border border-transparent rounded hover:border-gray-100 hover:shadow"> <a href="{{ route('posts.show', $post) }}" class="block w-full p-8"> <div class="pb-6 text-xl font-semibold border-b"> {{ $post->title }} </div> <div class="mt-4"> {{ Str::limit($post->content, 300) }} </div> </a></div>This card makes use of a posts.show named route and the dashboard.blade.php file makes use of a posts.create named route, which doesn't yet exist. Let's add that. First, create the PostsController:
php artisan make:controller PostsControllerThen, add this to the web.php routes file:
Route::resource('posts', Controllers\PostsController::class);We're adding a resource route because we'll make use of other resource actions as well.
There's still one component missing from our dashboard.blade.php view, the x-posts.empty. This component we'll have an empty message to show when there are no posts for the current user. Create the empty-list.blade.php file at resources/views/components/posts/:
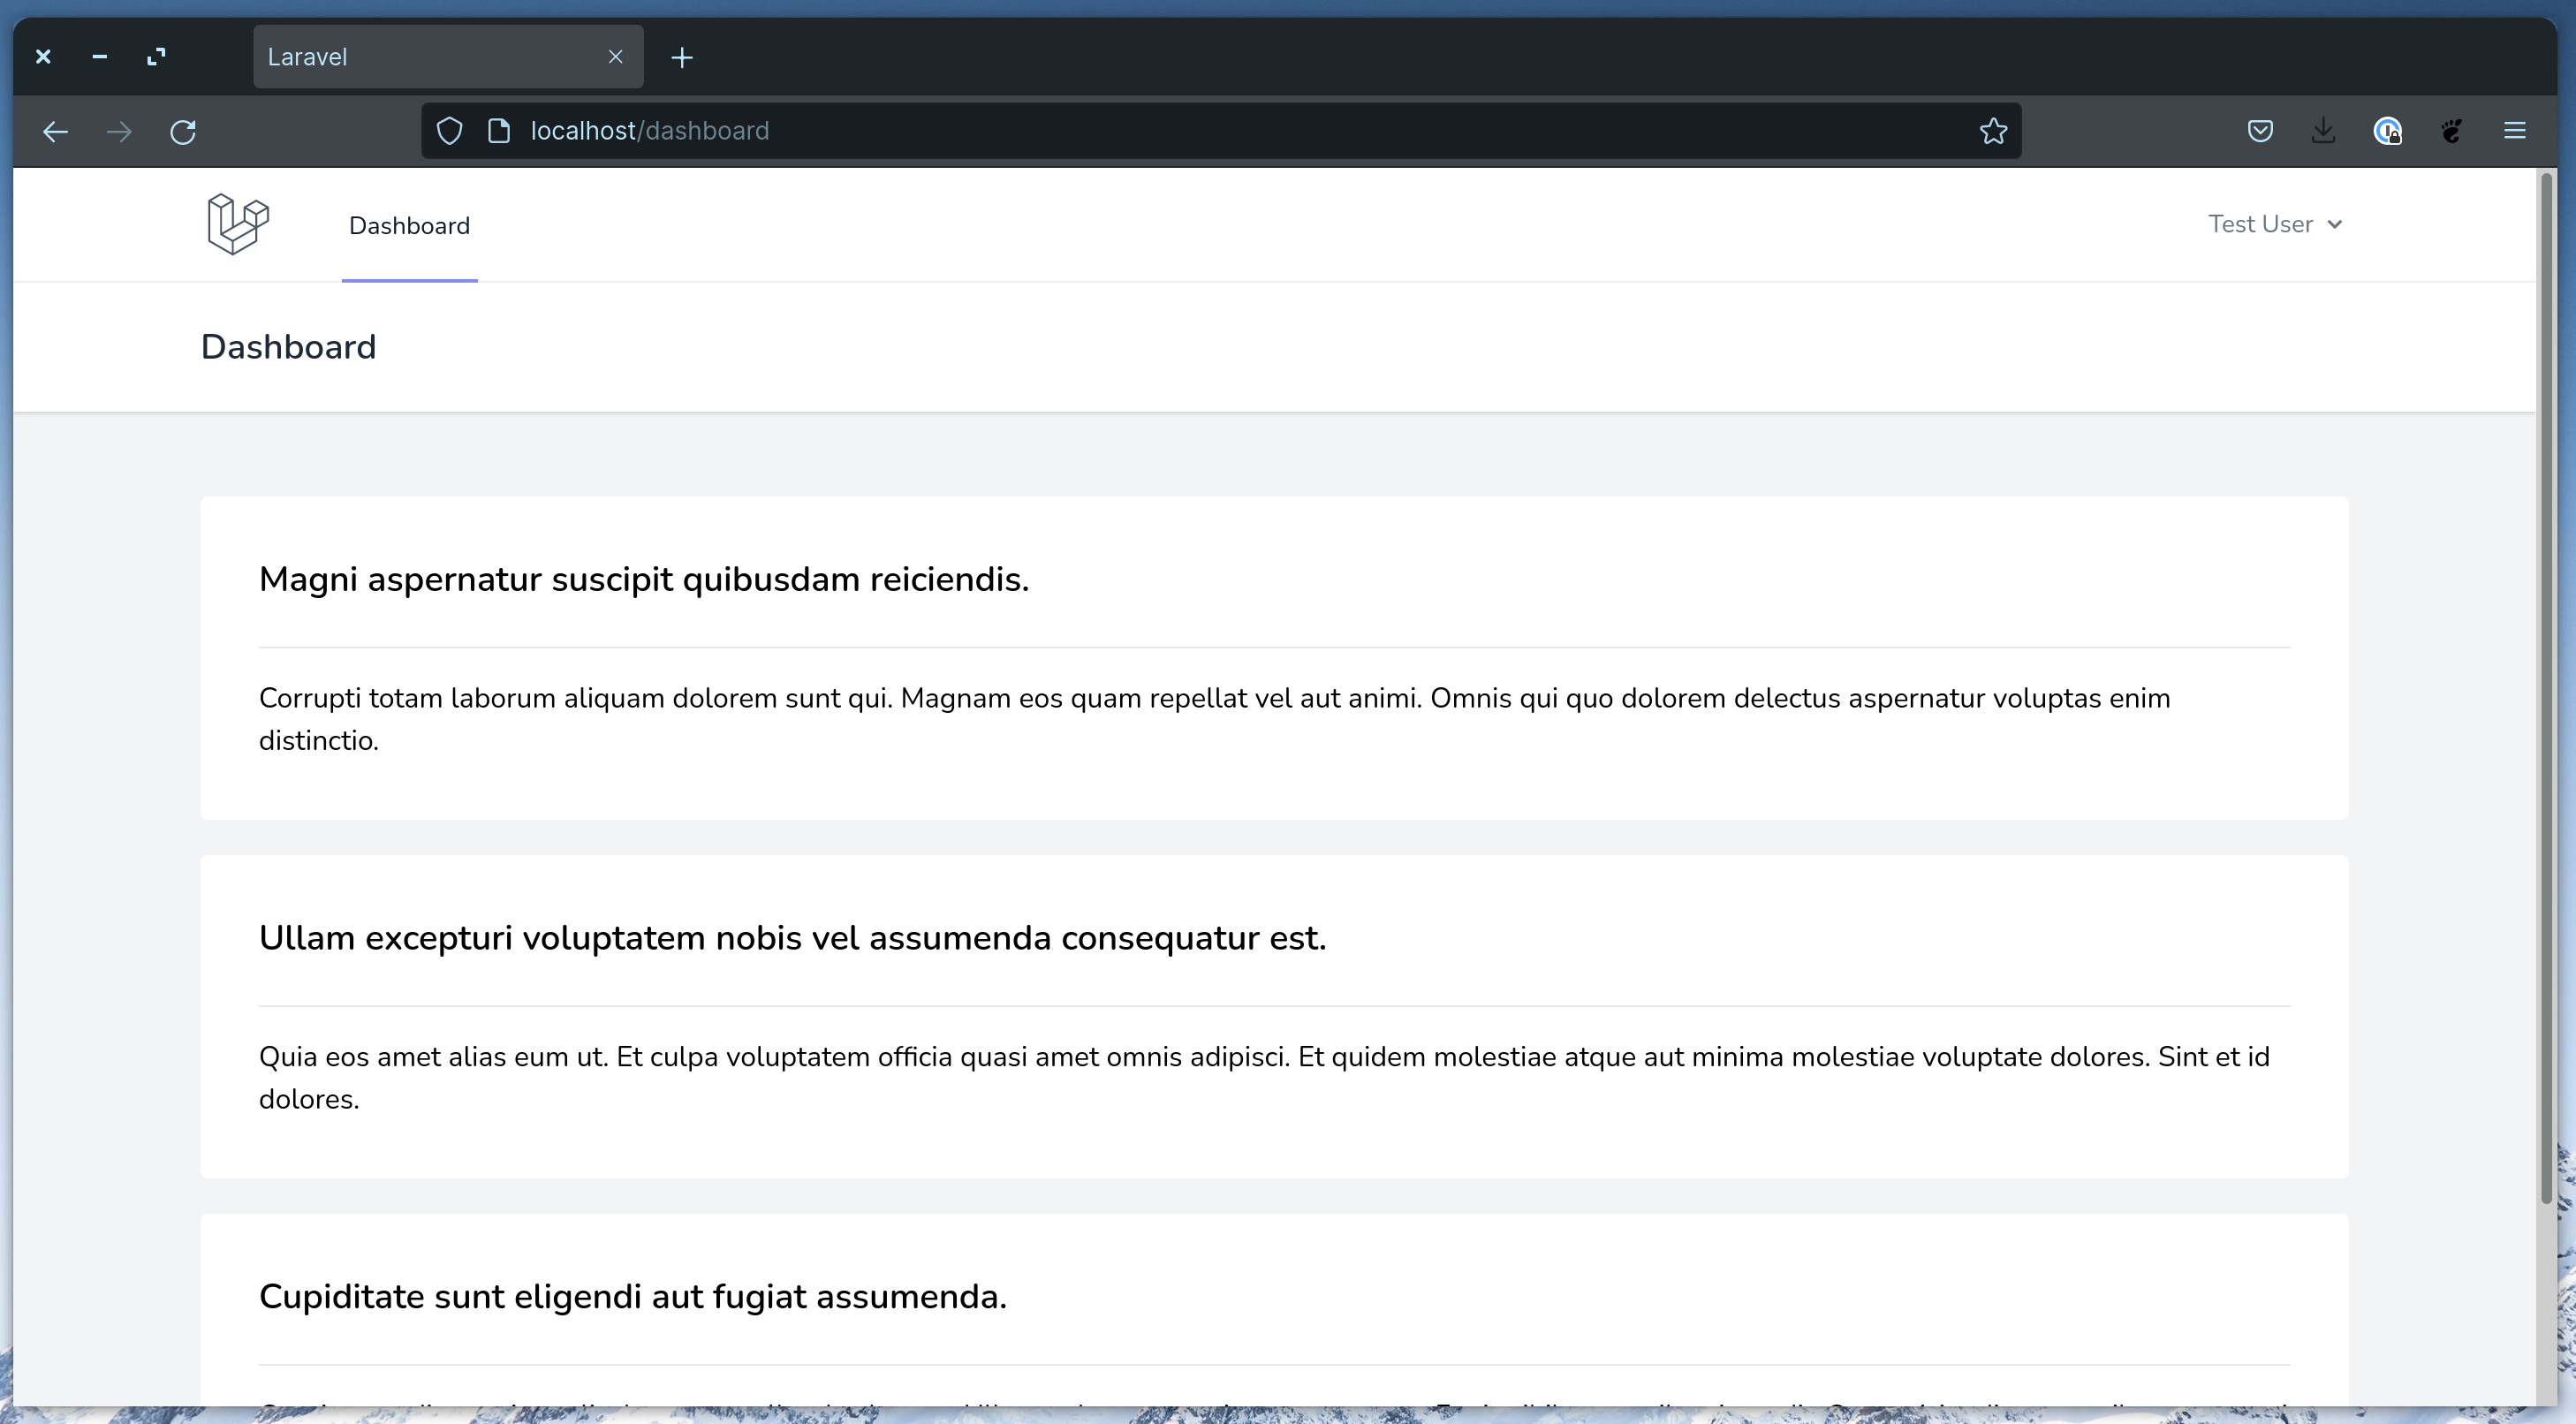
<div class="p-3 text-center"> <p>There are no posts yet.</p></div>Now, you should be able to see the latest 3 fake posts for the current user in the dashboard.
So far, so good. However, if we click in the "New Post" link, nothing happens yet. Let's add the create action to the PostsController:
/** * Show the form for creating a new resource. * * @return \Illuminate\Http\Response */public function create(){ return view('posts.create', [ 'post' => auth()->user()->posts()->make(), ]);}This makes use of a posts.create view which doesn't yet exist. Create a resources/views/posts/create.blade.php file with the following content:
<x-app-layout> <x-slot name="header"> <h2 class="text-xl font-semibold leading-tight text-gray-800"> <a href="{{ route('dashboard')}} ">Dashboard</a> / {{ __('New Post') }} </h2> </x-slot> <div class="py-12"> <div class="mx-auto max-w-7xl sm:px-6 lg:px-8"> <div class="p-8 bg-white rounded-lg"> <div id="create_post"> <x-posts.form :post="$post" /> </div> </div> </div> </div></x-app-layout>This makes use of a x-posts.form Blade component which we can create the resources/views/components/posts/form.blade.php file with the content:
<form method="POST" action="{{ route('posts.store') }}"> @csrf <!-- Post Title --> <div> <x-label for="title" :value="__('Title')" /> <x-input id="title" class="block w-full mt-1" placeholder="Type the title..." type="text" name="title" :value="old('title', $post->title)" required autofocus /> <x-input-validation for="title" /> </div> <!-- Post Content --> <div class="mt-4"> <x-label for="content" :value="__('Content')" class="mb-1" /> <x-forms.richtext id="content" name="content" :value="$post->content" /> <x-input-validation for="content" /> </div> <div class="flex items-center justify-between mt-4"> <div> <a href="{{ route('dashboard') }}">Cancel</a> </div> <div class="flex items-center justify-end"> <x-button class="ml-3"> {{ __('Save') }} </x-button> </div> </div></form>Almost all components used here comes with Breeze, except for the x-input-validation and the x-richtext components, which we'll add now. Create a resources/views/components/input-validatino.blade.php file with the contents:
@props('for') @if ($errors->has($for)) <p class="mt-1 text-sm text-red-800">{{ $errors->first($for) }}</p>@endifFor the richtext one, however, we're making it a simple textarea for now. Create the resources/components/forms/richtext.blade.php file with the content:
@props(['disabled' => false, 'value' => '']) <textarea {{ $disabled ? 'disabled' : '' }} {!! $attributes->merge(['class' => 'rounded-md shadow-sm border-gray-300 w-full focus:border-indigo-300 focus:ring focus:ring-indigo-200 focus:ring-opacity-50']) !!}>{{ $value }}</textarea>Ok, now if you click in the "New Posts" link, we should see the create posts form. To be able to create a post, let's add the store action to the PostsController:
/** * Store a newly created resource in storage. * * @param \Illuminate\Http\Request $request * @return \Illuminate\Http\Response */public function store(Request $request){ $request->user()->posts()->create($request->validate([ 'title' => ['required'], 'content' => ['required'], ])); return redirect()->route('dashboard');}Alright, if you try to create a post, you will get redirected back to the dashboard route and you should see the new post at the top. Nice!
Now, let's implement the posts.show route. So, add a show action the PostsController:
/** * Display the specified resource. * * @param \App\Models\Post $post * @return \Illuminate\Http\Response */public function show(Post $post){ return view('posts.show', [ 'post' => $post, ]);}And create the view file at resources/views/posts/show.blade.php with the content:
<x-app-layout> <x-slot name="header"> <h2 class="text-xl font-semibold leading-tight text-gray-800"> <a href="{{ route('dashboard') }}">Dashboard</a> / Post #{{ $post->id }} </h2> </x-slot> <div class="py-12"> <div class="mx-auto max-w-7xl sm:px-6 lg:px-8"> <div class="p-8 bg-white rounded-lg"> <div class="relative"> <div class="pb-6 text-xl font-semibold border-b"> {{ $post->title }} </div> <div class="absolute top-0 right-0" x-data x-on:click.away="$refs.details.removeAttribute('open')"> <details class="relative" x-ref="details"> <summary class="list-none" x-ref="summary"> <button type="button" x-on:click="$refs.summary.click()" class="text-gray-400 hover:text-gray-500"> <x-icon type="dots-circle" /> </button> </summary> <div class="absolute right-0 top-6"> <ul class="w-40 px-4 py-2 bg-white border divide-y rounded rounded-rt-0"> <li class="py-2"><a class="block w-full text-left" href="{{ route('posts.edit', $post) }}">Edit</a></li> <li class="py-2"><button class="block w-full text-left" form="delete_post">Delete</button></li> </ul> <form id="delete_post" x-on:submit="if (! confirm('Are you sure you want to delete this post?')) { return false; }" action="{{ route('posts.destroy', $post) }}" method="POST"> @csrf @method('DELETE') </form> </div> </details> </div> </div> <div class="mt-4"> {{ $post->content }} </div> </div> </div> </div></x-app-layout>This view uses an x-icon component, which uses a Heroicons SVG. You can create with this:
@props(['type']) <svg class="w-6 h-6" fill="none" stroke="currentColor" viewBox="0 0 24 24" xmlns="http://www.w3.org/2000/svg"> @if ($type === 'dots-circle') <path stroke-linecap="round" stroke-linejoin="round" stroke-width="2" d="M8 12h.01M12 12h.01M16 12h.01M21 12a9 9 0 11-18 0 9 9 0 0118 0z"></path> @endif</svg>With that, once you click in a post, you will see the entire post content. There's a dropdown here where you can see the "Edit" and "Delete" actions. Let's add the "destroy" action to the PostsController:
/** * Remove the specified resource from storage. * * @param \App\Models\Post $post * @return \Illuminate\Http\Response */public function destroy(Post $post){ $post->delete(); return redirect()->route('dashboard');}This should make the delete action work. Now, let's create the edit action so we can edit posts. Add the edit and update actions to the PostsController:
/** * Show the form for editing the specified resource. * * @param \App\Models\Post $post * @return \Illuminate\Http\Response */public function edit(Post $post){ return view('posts.edit', [ 'post' => $post, ]);} /** * Update the specified resource in storage. * * @param \Illuminate\Http\Request $request * @param \App\Models\Post $post * @return \Illuminate\Http\Response */public function update(Request $request, Post $post){ $post->update($request->validate([ 'title' => ['required', 'min:3', 'max:255'], 'content' => ['required'], ])); return redirect()->route('posts.show', $post);}Next, add the edit.blade.php view at resources/views/posts/edit.blade.php with the contents:
<x-app-layout> <x-slot name="header"> <h2 class="text-xl font-semibold leading-tight text-gray-800"> <a href="{{ route('dashboard')}} ">Dashboard</a> / {{ __('Edit Post #:id', ['id' => $post->id]) }} </h2> </x-slot> <div class="py-12"> <div class="mx-auto max-w-7xl sm:px-6 lg:px-8"> <div class="p-8 bg-white rounded-lg"> <div id="edit_post"> <x-posts.form :post="$post" /> </div> </div> </div> </div></x-app-layout>This will make use of the same form used to create posts, so we need to make some tweaks to it:
<form method="POST" action="{{ $post->exists ? route('posts.update', $post) : route('posts.store') }}"> @csrf @if ($post->exists) @method('PUT') @endif <!-- Post Title --> <div> <x-label for="title" :value="__('Title')" /> <x-input id="title" class="block w-full mt-1" placeholder="Type the title..." type="text" name="title" :value="old('title', $post->title)" required autofocus /> <x-input-validation for="title" /> </div> <!-- Post Content --> <div class="mt-4"> <x-label for="content" :value="__('Content')" class="mb-1" /> <x-forms.richtext id="content" name="content" :value="$post->content" /> <x-input-validation for="content" /> </div> <div class="flex items-center justify-between mt-4"> <div> @if ($post->exists) <a href="{{ route('posts.show', $post) }}">Cancel</a> @else <a href="{{ route('dashboard') }}">Cancel</a> @endif </div> <div class="flex items-center justify-end"> <x-button class="ml-3"> {{ __('Save') }} </x-button> </div> </div></form>With these changes, the form will post to the update action if the post model already exists or to the create action if it's a new instance. Similarly, the cancel link will lead the user to dashboard if it's a new instance or to the posts.show route if the post already exists.
That's it for the first part of this tutorial. We now have a fully functioning basic application where users can create keep track of their thoughts. We're still using just a simple textarea field. It's time to install Trix and the Rich Text Laravel package.
Use the Rich Text Laravel Package
To install the package, we can run:
composer require tonysm/rich-text-laravelNext, run the package's install command:
php artisan richtext:installThis will do:
- Publish the
create_rich_texts_tablemigration - Add
trixto thepackage.jsonfile as a dev dependency - Publish the Trix bootstrap file to
resources/js/libs/trix.js
Let's import that file in the resources/js/app.js file:
require('./bootstrap.js'); require('alpinejs'); require('./libs/trix.js');Then, add the Trix styles to the resources/css/app.css file:
/** These are specific for the tag that will be added to the rich text content */.trix-content .attachment-gallery > .attachment,.trix-content .attachment-gallery > rich-text-attachment { flex: 1 0 33%; padding: 0 0.5em; max-width: 33%;} .trix-content .attachment-gallery.attachment-gallery--2 > .attachment,.trix-content .attachment-gallery.attachment-gallery--2 > rich-text-attachment,.trix-content .attachment-gallery.attachment-gallery--4 > .attachment,.trix-content .attachment-gallery.attachment-gallery--4 > rich-text-attachment { flex-basis: 50%; max-width: 50%;} .trix-content rich-text-attachment .attachment { padding: 0 !important; max-width: 100% !important;} /** These are TailwindCSS specific tweaks */.trix-content { @apply w-full;} .trix-content h1 { font-size: 1.25rem !important; line-height: 1.25rem !important; @apply leading-5 font-semibold mb-4;} .trix-content a:not(.no-underline) { @apply underline;} .trix-content ul { list-style-type: disc; padding-left: 2.5rem;} .trix-content ol { list-style-type: decimal; padding-left: 2.5rem;} .trix-content img { margin: 0 auto;}Let's install Trix and compile the assets:
npm install && npm run devBy default, the Rich Text Laravel package ships with a suggested database structure. All Rich Text contents will live in the rich_texts table. Now, we need to migrate our content field from the posts table and create rich_text entries for each existing post. If you're starting a new application with the package, you can skip this part. I just wanted to demo how you could do a simple migration.
Create the migration:
php artisan make:migration migrate_posts_content_field_to_the_rich_text_tableChange the up method of the newly created migration to add the following content:
foreach (DB::table('posts')->oldest('id')->cursor() as $post){ DB::table('rich_texts')->insert([ 'field' => 'content', 'body' => '<div>' . $post->content . '</div>', 'record_type' => (new Post)->getMorphClass(), 'record_id' => $post->id, 'created_at' => $post->created_at, 'updated_at' => $post->updated_at, ]);} Schema::table('posts', function (Blueprint $table) { $table->dropColumn('content');});Since the RichText model is a polymorphic one, let's enforce the morphmap so we avoid storing the class's FQCN in the database by adding the following line in the boot method of theAppServiceProvider:
Relation::enforceMorphMap([ 'post' => \App\Models\Post::class,]);Now, let's add the HasRichText trait to the Post model and define our content field as a Rich Text field:
<?php namespace App\Models; use Illuminate\Database\Eloquent\Factories\HasFactory;use Illuminate\Database\Eloquent\Model;use Tonysm\RichTextLaravel\Models\Traits\HasRichText; class Post extends Model{ use HasFactory; use HasRichText; protected $guarded = []; protected $richTextFields = [ 'content', ];}Right now, the application is not working as you would expect. If you try to open it in the browser, you will see that it's not really behaving properly. First, we can see the <div> tag in the output both in the dashboard and in the posts.show routes. Let's fix the dashboard route first.
This will be a good opportunity to show a feature of the package: it can convert any Rich Text content to plain text! To achieve that, change the card component to be the following:
-{{ Str::limit($post->content, 300) }}+{{ Str::limit($post->content->toPlainText(), 300) }}Before, our content field was just a simple text field. Now, we get an instance of the RichText model, which forwards calls to the underlying Content class. The Content class has some really cool methods, such as the toPlainText() we see here.
With the card component taken care of, let's see what we can do for the posts.show route. It's still displaying the HTML tags. That's because Laravel's Blade will escape any HTML content when you're echoing out using double curly braces {{ }}, and that's not what we want. We need to let the HTML render on the page so any other tag such as h1s or ul created by Trix also display correctly.
Achieving that is relatively simple: use {!! !!} instead of @{{ }}. However, there's a serious gotcha here that allows malicious users to exploit an XSS attack. We'll talk more about that in the next section. For now, let's make the naive change:
-{{ $post->content }}+{!! $post->content !!}And voilà! The HTML tags are no longer being escaped and the HTML content is rendering again. Cool.
One last piece before we jump to the next section. We are still using a textarea in our form. Let's replace it with the Trix editor. Trix is already installed and assets should have been compiled earlier, so I think we're ready. Change the contents of the richtext form component to this:
@props(['id', 'value', 'name', 'disabled' => false]) <input type="hidden" id="{{ $id }}_input" name="{{ $name }}" value="{{ $value?->toTrixHtml() }}" /><trix-editor id="{{ $id }}" input="{{ $id }}_input" {{ $disabled ? 'disabled' : '' }} {!! $attributes->merge(['class' => 'trix-content rounded-md shadow-sm border-gray-300 focus:border-indigo-300 focus:ring focus:ring-indigo-200 focus:ring-opacity-50']) !!}></trix-editor>Open up the browser again and you should see the Trix editor! Ain't this cool? Make some changes to the content and submit the form. Everything should be working as before.
There are two HTML elements here to make Trix work as we want: the input and the trix-editor elements. The input is hidden, so users don't actually see it, but this is the input that will be submitted by the browser containing the latest state of the HTML content for our field. We feed it using the toTrixHtml() method that we get from our Content class. Trix will take care of keeping the state from the editor in sync with the value of the input field, so you don't have to worry about that.
Now, let's handle the XSS attack vector we enabled by outputting non-escaped HTML content.
HTML Sanitization
Before we fix the issue, let's exploit it ourselves. Go to your browser, open the create posts form, open up your DevTools, find and delete the trix-editor element and change the hidden input type to text so the input is displayed. Now, replace its value with a script tag, like so:
<script>alert('hey, there');</script>Submit the form and got to that post's show page. Oh, noes. The JavaScript was executed by the browser. We don't want that, right? We can fix it with a technique called HTML Sanitization. We don't actually need to allow the entire HTML spec to be rendered. We only need a subset of it so our rich text content is displayed correctly. So, for one, we don't need to render any <script> tag. We cannot use something like PHP's strip_tags function, because that would get rid of all tags, so our <b> or <a> tags would be gone. We could maybe pass it a list of allowed HTML tags, but we could still be exploited using some HTML attributes.
Instead, let's use a package that will handle most of the work for us. That's mews/purifier:
composer require mews/purifierThe package gives us a clean() helper function that we can use to display sanitized. Let's change our posts/show.blade.php view to use that function:
-{!! $post->content !!}+{!! clean($post->content) !!}If you check that out in the browser you will notice that you no longer see the alert! So our problem was fixed. We still need to make some tweaks to the Sanitizer's default configs, but for now, that will do. Try out some rich text tweaks and see if they are displayed correctly. Most of them should.
Before we change the configs, let's explore one side of Trix that's not currently working: image uploads.
Simple Image Uploading
If you try to attach an image to Trix, it's not working out of the box. The image kinda shows up, but in a "pending" state, which means that this change was actually not made to the Trix document. See, Trix doesn't know how our application handles image upload, so it's up to us help it.
Let's use Alpine.js, which already comes installed with Breeze, to implement image uploading. First, let's cover the client-side of image uploading. Open up the richtext.blade.php component, and initialize Alpine in the trix-editor element:
<trix-editor x-data="{ // ... }"></trix-editor>Cool. Trix will dispatch a custom event called trix-attachment-add whenever you attempt to upload an attachment. We need to listen to that event and do the upload. The event will contain the file we have to upload as well as the Trix.Attachment instance object which we'll use later to set some attributes on it so we can tell Trix the attachment is no longer pending so it can update the Document state:
@props(['id', 'value', 'name', 'disabled' => false]) <input type="hidden" id="{{ $id }}_input" name="{{ $name }}" value="{{ $value?->toTrixHtml() }}"/><trix-editor id="{{ $id }}" input="{{ $id }}_input" {{ $disabled ? 'disabled' : '' }} {!! $attributes->merge(['class' => 'trix-content rounded-md shadow-sm border-gray-300 focus:border-indigo-300 focus:ring focus:ring-indigo-200 focus:ring-opacity-50']) !!} x-data="{ upload(event) { const data = new FormData(); data.append('attachment', event.attachment.file); window.axios.post('/attachments', data, { onUploadProgress(progressEvent) { event.attachment.setUploadProgress( progressEvent.loaded / progressEvent.total * 100 ); }, }).then(({ data }) => { event.attachment.setAttributes({ url: data.image_url, }); }); } }" x-on:trix-attachment-add="upload"></trix-editor>That's cool. We're sending a request to POST /attachments with an attachment field and we expect a image_url in the response data. Let's implement the server-side for that. We'll simply add a route Closure to our web.php routes file for now:
Route::post('/attachments', function () { request()->validate([ 'attachment' => ['required', 'file'], ]); $path = request()->file('attachment')->store('trix-attachments', 'public'); return [ 'image_url' => Storage::disk('public')->url($path), ];})->middleware(['auth'])->name('attachments.store');If you try to attach an image now, uploading should just work! But there should be a problem when you visit that post's show page: the image is broken. Let's publish the config so we can tweak it a little bit:
php artisan vendor:publish --provider="Mews\Purifier\PurifierServiceProvider"Now, open up the /config/purifier.php and replace its contents:
<?php return [ 'encoding' => 'UTF-8', 'finalize' => true, 'ignoreNonStrings' => false, 'cachePath' => storage_path('app/purifier'), 'cacheFileMode' => 0755, 'settings' => [ 'default' => [ 'HTML.Doctype' => 'HTML 4.01 Transitional', 'HTML.Allowed' => 'rich-text-attachment[sgid|content-type|url|href|filename|filesize|height|width|previewable|presentation|caption|data-trix-attachment|data-trix-attributes],div,b,strong,i,em,u,a[href|title|data-turbo-frame],ul,ol,li,p[style],br,span[style],img[width|height|alt|src],del,h1,blockquote,figure[data-trix-attributes|data-trix-attachment],figcaption,pre,*[class]', 'CSS.AllowedProperties' => 'font,font-size,font-weight,font-style,font-family,text-decoration,padding-left,color,background-color,text-align', 'AutoFormat.AutoParagraph' => true, 'AutoFormat.RemoveEmpty' => true, ], 'test' => [ 'Attr.EnableID' => 'true', ], "youtube" => [ "HTML.SafeIframe" => 'true', "URI.SafeIframeRegexp" => "%^(http://|https://|//)(www.youtube.com/embed/|player.vimeo.com/video/)%", ], 'custom_definition' => [ 'id' => 'html5-definitions', 'rev' => 1, 'debug' => false, 'elements' => [ // http://developers.whatwg.org/sections.html ['section', 'Block', 'Flow', 'Common'], ['nav', 'Block', 'Flow', 'Common'], ['article', 'Block', 'Flow', 'Common'], ['aside', 'Block', 'Flow', 'Common'], ['header', 'Block', 'Flow', 'Common'], ['footer', 'Block', 'Flow', 'Common'], // Content model actually excludes several tags, not modelled here ['address', 'Block', 'Flow', 'Common'], ['hgroup', 'Block', 'Required: h1 | h2 | h3 | h4 | h5 | h6', 'Common'], // http://developers.whatwg.org/grouping-content.html ['figure', 'Block', 'Optional: (figcaption, Flow) | (Flow, figcaption) | Flow', 'Common'], ['figcaption', 'Inline', 'Flow', 'Common'], // http://developers.whatwg.org/the-video-element.html#the-video-element ['video', 'Block', 'Optional: (source, Flow) | (Flow, source) | Flow', 'Common', [ 'src' => 'URI', 'type' => 'Text', 'width' => 'Length', 'height' => 'Length', 'poster' => 'URI', 'preload' => 'Enum#auto,metadata,none', 'controls' => 'Bool', ]], ['source', 'Block', 'Flow', 'Common', [ 'src' => 'URI', 'type' => 'Text', ]], // http://developers.whatwg.org/text-level-semantics.html ['s', 'Inline', 'Inline', 'Common'], ['var', 'Inline', 'Inline', 'Common'], ['sub', 'Inline', 'Inline', 'Common'], ['sup', 'Inline', 'Inline', 'Common'], ['mark', 'Inline', 'Inline', 'Common'], ['wbr', 'Inline', 'Empty', 'Core'], // http://developers.whatwg.org/edits.html ['ins', 'Block', 'Flow', 'Common', ['cite' => 'URI', 'datetime' => 'CDATA']], ['del', 'Block', 'Flow', 'Common', ['cite' => 'URI', 'datetime' => 'CDATA']], // RichTextLaravel ['rich-text-attachment', 'Block', 'Flow', 'Common'], ], 'attributes' => [ ['iframe', 'allowfullscreen', 'Bool'], ['table', 'height', 'Text'], ['td', 'border', 'Text'], ['th', 'border', 'Text'], ['tr', 'width', 'Text'], ['tr', 'height', 'Text'], ['tr', 'border', 'Text'], ], ], 'custom_attributes' => [ ['a', 'target', 'Enum#_blank,_self,_target,_top'], // RichTextLaravel ['a', 'data-turbo-frame', 'Text'], ['img', 'class', new HTMLPurifier_AttrDef_Text()], ['rich-text-attachment', 'sgid', new HTMLPurifier_AttrDef_Text], ['rich-text-attachment', 'content-type', new HTMLPurifier_AttrDef_Text], ['rich-text-attachment', 'url', new HTMLPurifier_AttrDef_Text], ['rich-text-attachment', 'href', new HTMLPurifier_AttrDef_Text], ['rich-text-attachment', 'filename', new HTMLPurifier_AttrDef_Text], ['rich-text-attachment', 'filesize', new HTMLPurifier_AttrDef_Text], ['rich-text-attachment', 'height', new HTMLPurifier_AttrDef_Text], ['rich-text-attachment', 'width', new HTMLPurifier_AttrDef_Text], ['rich-text-attachment', 'previewable', new HTMLPurifier_AttrDef_Text], ['rich-text-attachment', 'presentation', new HTMLPurifier_AttrDef_Text], ['rich-text-attachment', 'caption', new HTMLPurifier_AttrDef_Text], ['rich-text-attachment', 'data-trix-attachment', new HTMLPurifier_AttrDef_Text], ['rich-text-attachment', 'data-trix-attributes', new HTMLPurifier_AttrDef_Text], ['figure', 'data-trix-attachment', new HTMLPurifier_AttrDef_Text], ['figure', 'data-trix-attributes', new HTMLPurifier_AttrDef_Text], ], 'custom_elements' => [ ['u', 'Inline', 'Inline', 'Common'], // RichTextLaravel ['rich-text-attachment', 'Block', 'Flow', 'Common'], ], ], ];If you refresh the browser now you will see that our img tag is now wrapped with a figure tag. But it's still not working, right?
That's because we need to symlink the storage folder to our public/ directory locally so images uploaded to the public disk using the local driver are displayed correctly:
# If you're using Sail:sail artisan storage:link # Otherwise, use this:php artisan storage:linkThat should fix it! Great.
This will do it for an introductory guide, I think. I plan to write more advanced guides like User mentions and advanced image uploading using Spatie's Media Library package. I'll see you on the next post.